

Overview
This article teaches you how to connect your KOMOJU account to your Shopify store. You'll learn the connection process for payment methods, how to test your integration to verify everything works correctly, and how to go live to accept real payments from customers.
By the end of this guide, you'll know how to connect and test your first payment method. The connection process you learn here applies to all KOMOJU payment methods on Shopify, so once you complete this setup, you can easily add more payment methods using the same steps.
This guide assumes your Live Mode application is already approved. If your application is still pending or you haven't applied yet, complete that process first before following this integration guide. See How to Apply for Live Mode (Commercial Use) for more information
Understanding the Shopify-KOMOJU Integration
KOMOJU provides multiple payment methods for your Shopify store through a built-in integration that requires no custom development.
When customers check out from your Shopify store, they can select from the KOMOJU payment methods you've enabled. After selecting a payment method, customers complete their payment through KOMOJU's secure hosted payment pages, then return to your store upon completion. Each payment method integrates as a separate Shopify app, making setup straightforward - simply connect the payment methods you want to offer and configure their settings.
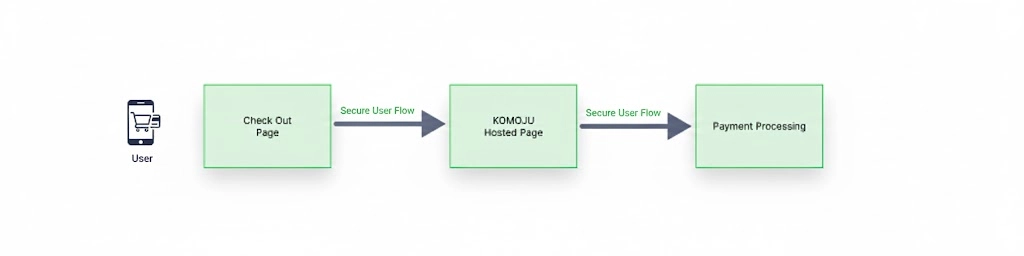
KOMOJU supports a wide range of payment methods including Japan-focused options (convenience store payments, smartphone payments like PayPay and Merpay, and bank transfers) and international methods for global reach. You can enable multiple payment methods to give customers flexibility and increase conversion rates. KOMOJU handles all payment security and compliance, allowing you to focus on your store.
For a complete list of available payment methods and their regional availability, see our FAQ page for a full list of supported payments methods.
Connecting Your First Payment Method
The connection process links your KOMOJU account to your Shopify store through payment method specific apps. Each payment method you want to offer requires its own connection and installation.
The Shopify-KOMOJU integration uses Shopify's app marketplace. This means each payment method installs as a separate app in your Shopify store.
Step 1: Access External Connections
From your KOMOJU dashboard, navigate to Settings → External Connections, then click Get started under the Shopify section.
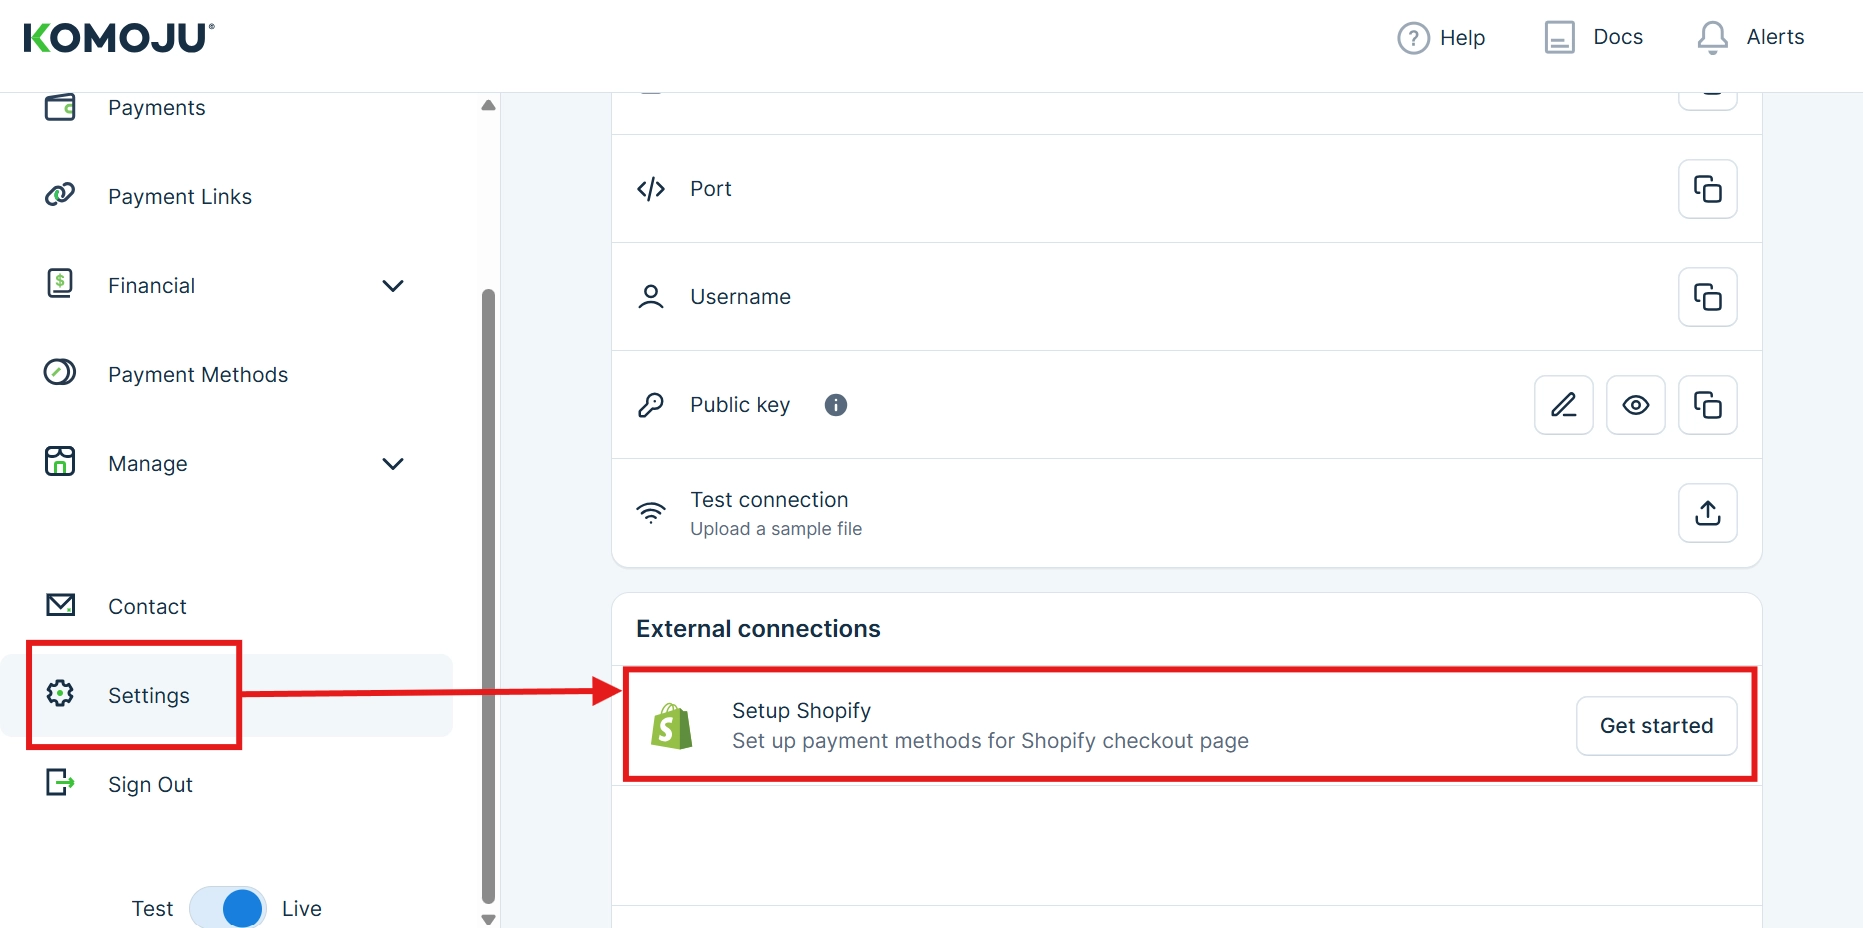
This opens a list of all payment methods available for your KOMOJU account.
Step 2: Select Your Payment Method
After choosing 'Get Started', you will navigate to a page that shows all available payment methods for your KOMOJU account. Choose the method you wish to connect to Shopify via the 'Connect' button.
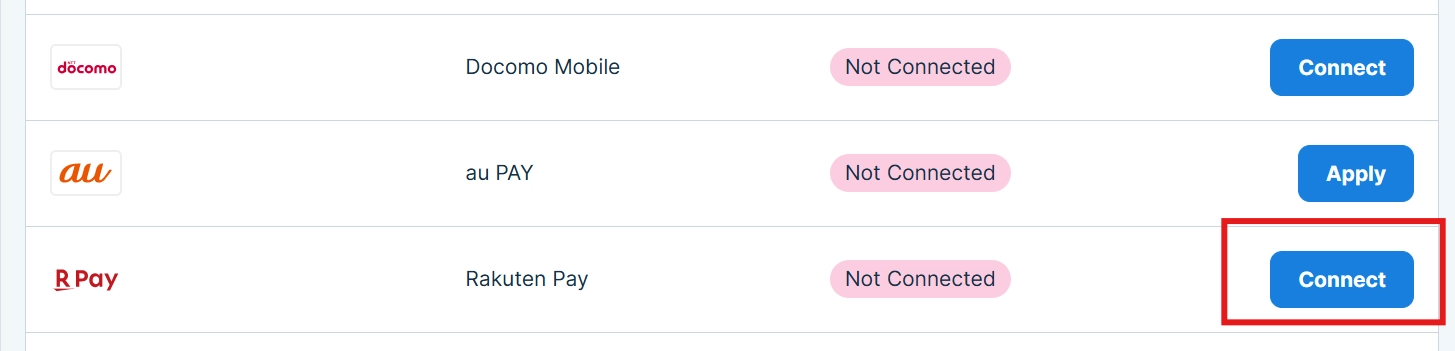
If you see "Apply" instead of "Connect", you'll need to complete the payment method application process first. Each payment method has its own approval requirements.
Step 3: Connect to Shopify
After clicking Connect, you'll be redirected to Shopify. The system will prompt you to log in using your Shopify store credentials.
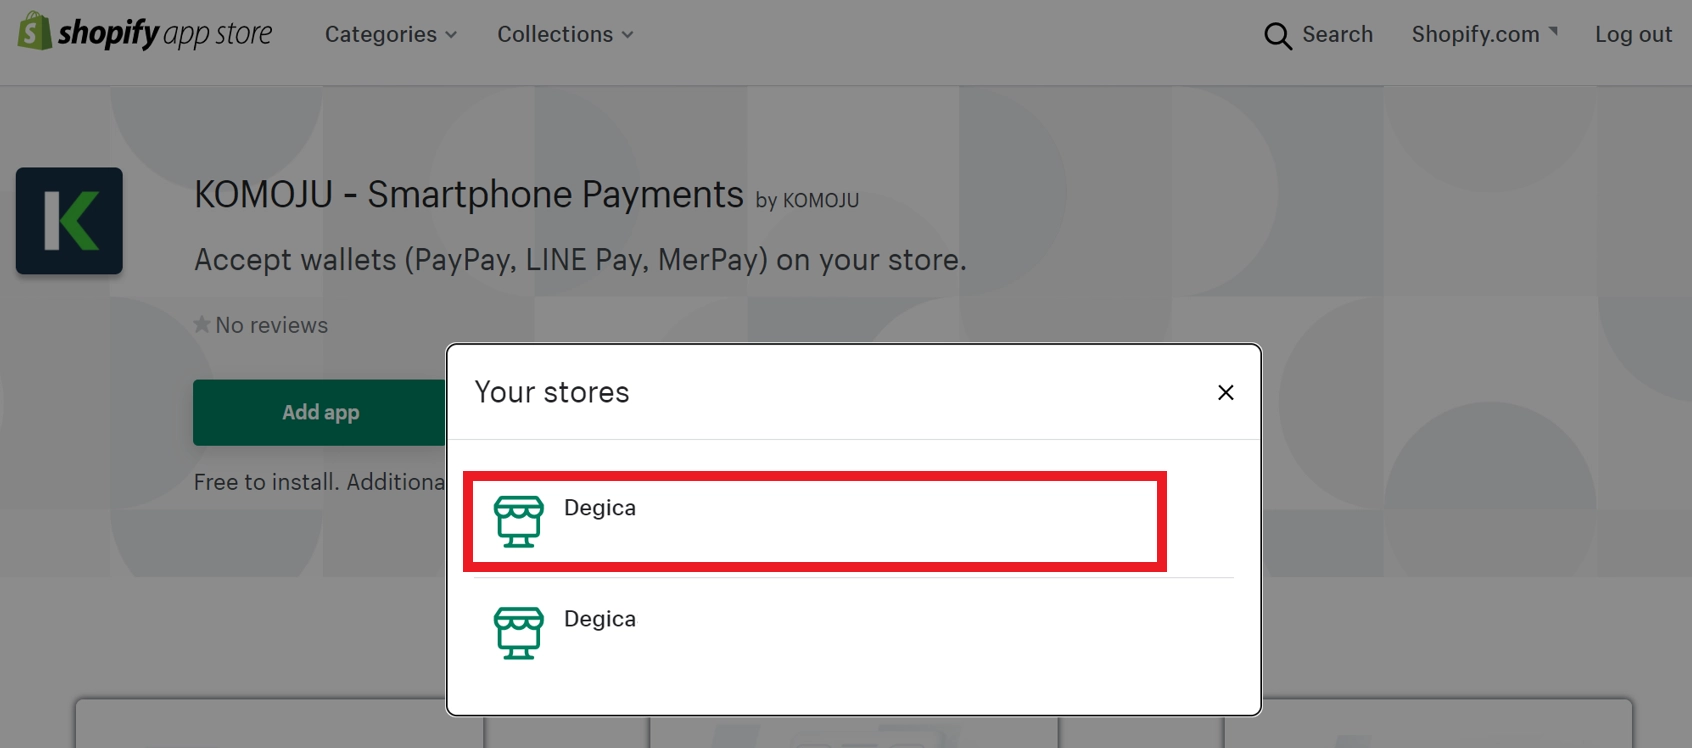
If you manage multiple Shopify stores, you'll be prompted to select which store to connect. Choose the appropriate store for this integration.
You need admin or store owner permissions in Shopify to install payment apps. Standard staff accounts may not have sufficient access.
Step 4: Install the Payment App
Once logged in and on the Shopify App's installation page, you'll see details about the payment method app you're installing.
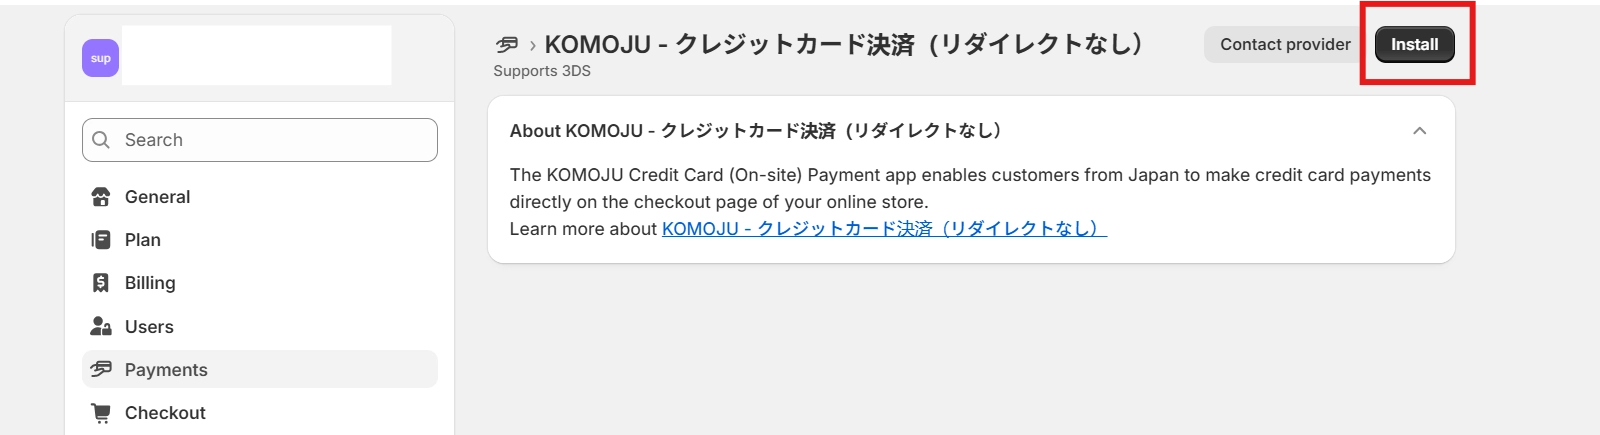
Locate the Install button in the top right corner of the page and click it.
If the Install button appears greyed out or disabled, your Shopify store address may not be in a supported country for this payment method. Verify your store's country settings in Shopify under Settings → Store details.
You will be directed to review the app's permissions one last time. Click install once you are ready to continue.
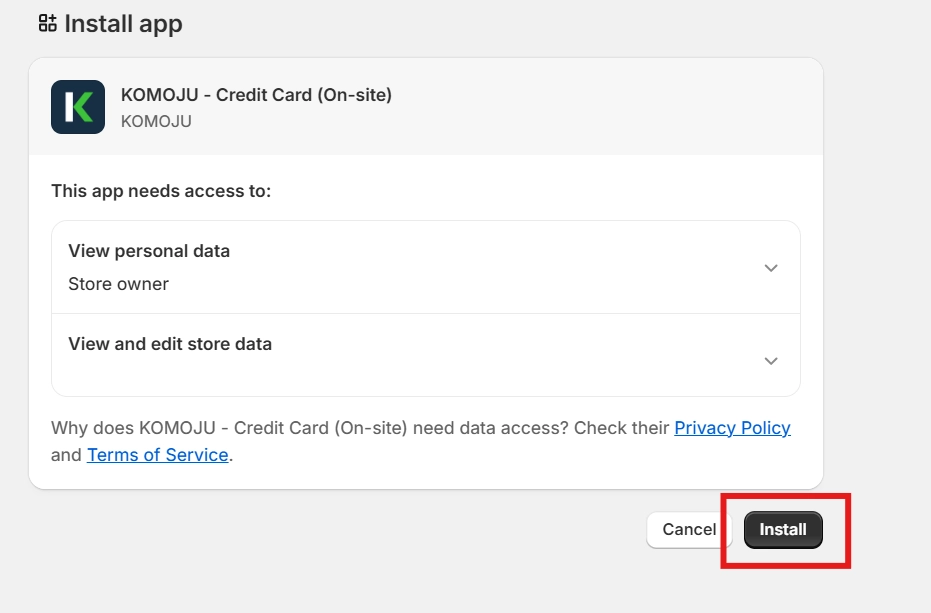
Step 5: Connect Your KOMOJU Account
After choosing to install the app, you will be directed to connect your KOMOJU account. Be sure to choose the correct account in the case that you manage multiple KOMOJU accounts.
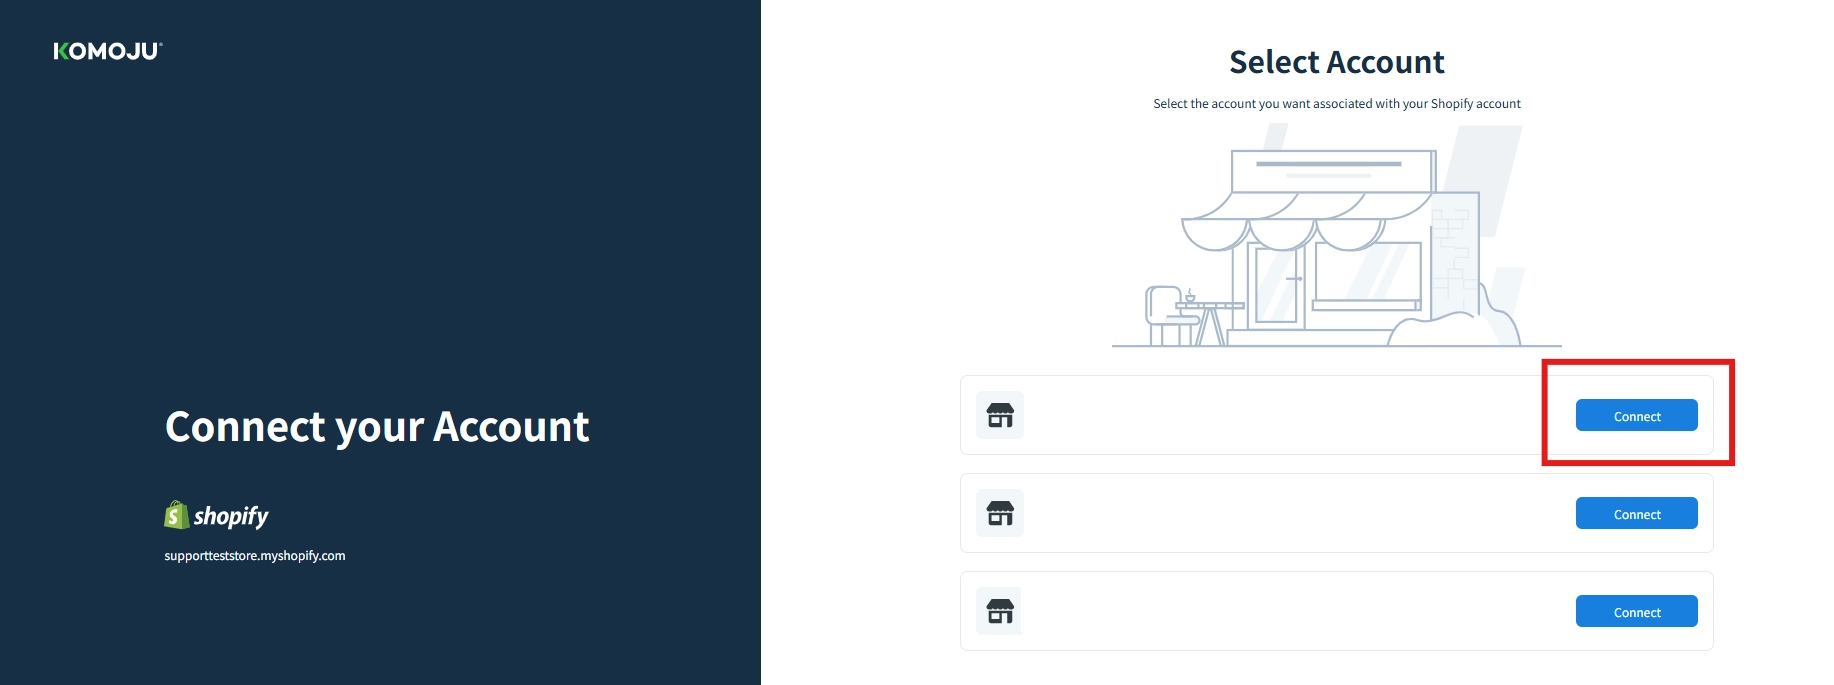
If you need to remove an account, you will need to deactivate and uninstall the payment method's Shopify app from your store's plugins and then reinstall to select the correct KOMOJU account.
Choosing the wrong account will cause your payment data to flow to the wrong account, which could lead to PII being exposed unexpectedly.
Step 6: Activate the Shopify App
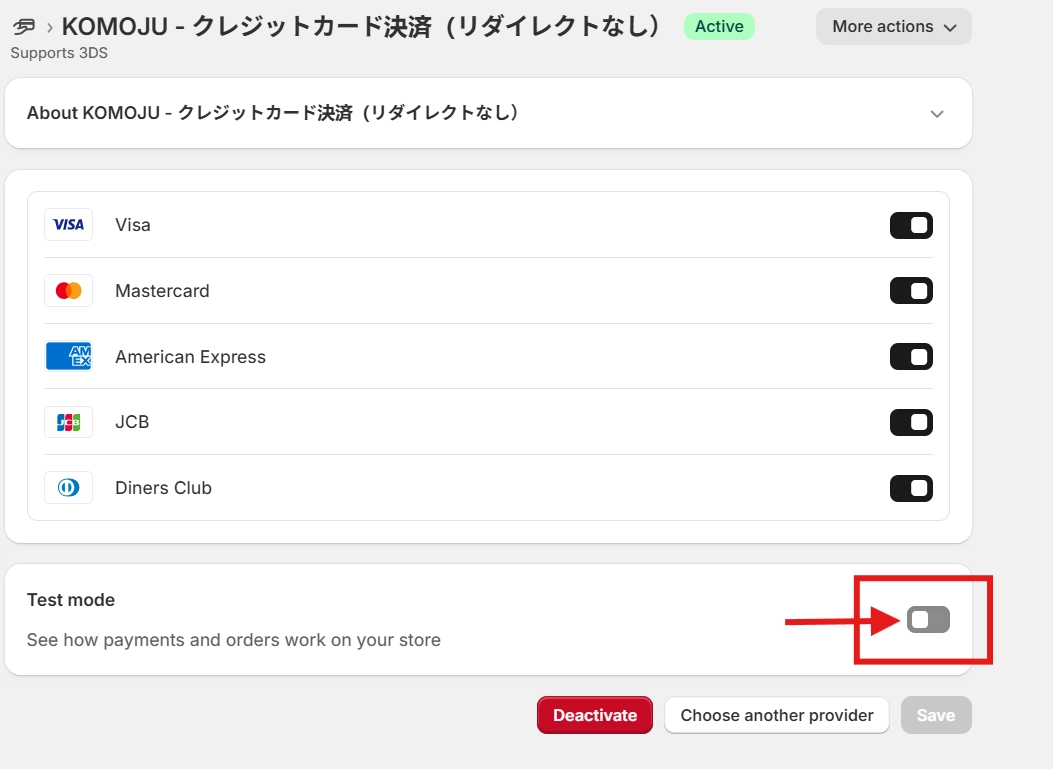
Once you have installed your payment method's Shopify app, you will then need to activate it so that it is visible for users on your store's checkout page.
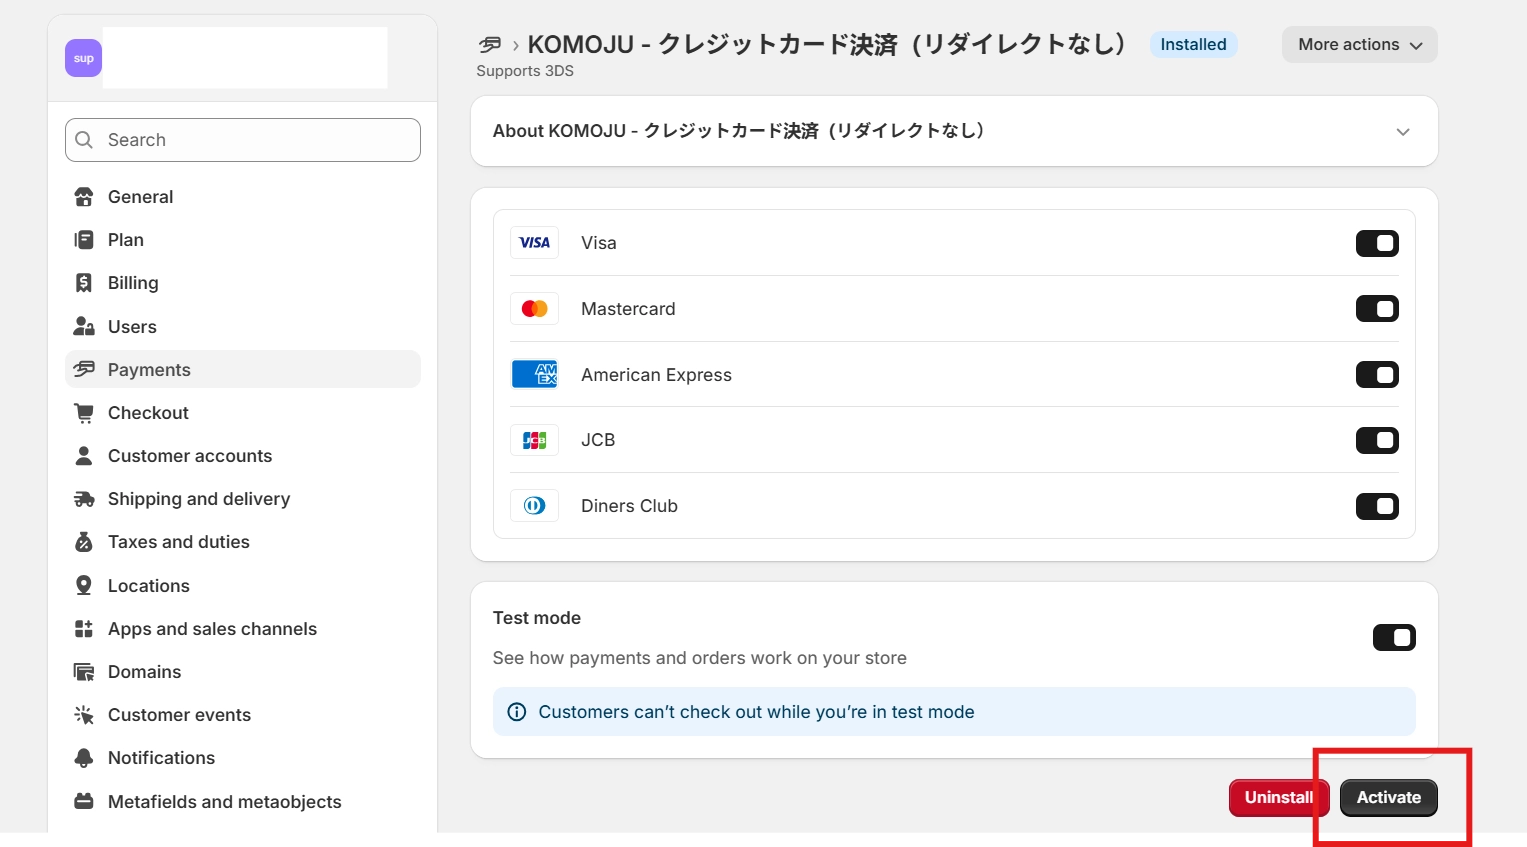
Note that test mode is off by default. Please see Testing Your Integration for more information on testing you payment method.
Step 7: Complete the Installation
After clicking Install, Shopify processes the app installation and activates the payment method for your store.
Once finished, you can follow the steps below to verity that your payment method has been successfully connected.
- In your KOMOJU dashboard, return to Settings → External Connections
- The payment method should now show status: Connected
- In your Shopify admin, navigate to Settings → Payments
- The payment method should appear as activated
The connection process is identical for additional payment methods. Simply repeat these steps for each payment method you want to enable. You can connect multiple payment methods to the same Shopify store.
Testing Your Integration
Before accepting real customer payments, test your integration to verify everything works correctly. Test mode allows you to simulate the complete payment flow without processing actual transactions.
Test mode helps you catch configuration issues, verify payment flows, and ensure your store handles payments correctly before going live with customers.
Enabling Test Mode
Test mode is configured per payment method, not globally. You'll need to enable it for each payment method you want to test.
To enable test mode:
- In your Shopify admin, navigate to Settings → Payments
- Locate the KOMOJU payment method you want to test
- Click on the payment method to access its app settings page
- Find the Test Mode section
- Toggle test mode to On
- Ensure the payment app is Activated (not just test mode enabled)
You should test each payment method you've connected to verify they all work correctly with your store configuration.
Running Test Payments
With test mode enabled, you can simulate payments without processing real transactions.
When using Test Mode, offsite payment methods like PayPay, Merpay, etc. redirect to simulated payment pages instead of actual payment apps. No actual money changes hands regardless of payment method used.
For payment methods that require card numbers or other credentials, use test values. See test cards for valid test inputs.
Once you are ready, follow the steps below to test your payment method's integration.
- Initiate a test payment from your Shopify store's checkout as a customer would.
- Complete the payment process fully through to confirmation.
- Check that the test payment appears in your KOMOJU account.
- Once completed, the payment should also appear in your Shopify admin dashboard.
If you forget to disable test mode, customers will not be able to make real payments. Always turn off test mode before opening your store to customers.
Depending on your store setup, you may want to verify other settings like inventory management, order notifications, or fulfillment workflows. These vary by merchant configuration.
Once you've tested your integration and verified everything works correctly, you're ready to accept real customer payments. To go live, simply disable test mode for each payment method you want to activate.
Your KOMOJU account was approved for live payments when you completed the Live Mode application process. No additional approval is needed at this stage.
There is no visual distinction on the checkout page between payment methods in test mode versus live mode. If customers select a payment method that's in test mode, they won't be able to complete the payment, and it won't be obvious why. If you have any payment methods already live for customers, avoid keeping other methods in test mode to prevent customer confusion.
Switching Back to Test Mode
If you need to re-enable test mode for troubleshooting or additional testing, you can toggle it back on at any time.
Re-enabling test mode will immediately prevent customers from making real payments with that payment method. Customers cannot visually distinguish between test mode and live mode payment methods on the checkout page - if they select a method in test mode, the payment will fail without a clear explanation. Use extreme caution when switching live methods back to test mode, especially during business hours or when customers may be actively shopping.